Gluten-free Blueberry Orange Muffin Recipe


Hello to everyone visiting from Pinterest!  I'm so happy that you've found my little corner of the Internet :) There's quite a bit here to explore, so please have a look around! Also, I'd love it if you would join us over on Facebook:


I was totally stumped with what to do with the coconut flour Bob's Red Mill sent in the trio of ingredients to review... We don't have any major gluten intolerance in my house, and there usually isn't anything fabulously-tasting about gluten-free foods. But, in a burst of creativity one night last week, Little Bear and I ventured into the world of gluten-free baking.

My expectations were low, but, I dare say that these little gems are so amazingly moist and flavorful, that no one will suspect that they are gluten free at all!

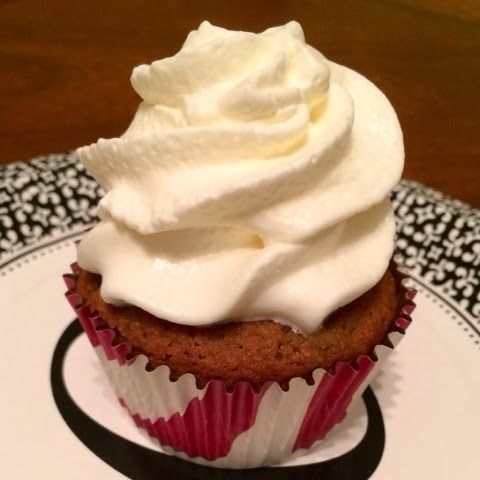
For an extra treat, we topped with whipped cream!

Ingredients
  • 1/2 cup + 1 tablespoon coconut flour, sifted or whisked to remove lumps
  • 1/2 teaspoon sea salt
  • 1/2 teaspoon baking soda
  • 3 extra large eggs
  • 1/2 cup unrefined honey melted
  • 1/2 cup coconut oil, melted
  • 1 tablespoon vanilla extract
  • 1/4 teaspoon orange extract 
  • 1/2 cup frozen blueberries
  • 1/2 cup fresh orange segments, finely chopped
Directions

1.  In a small bowl, mix together the coconut flour, salt and baking soda.

2.  In a large bowl, combine eggs, honey, coconut oil, vanilla, and orange extract. Mix on high until the mixture is even.

3.  Mix dry ingredients into the wet ingredients. Mixing on high until all of the lumps are removed (you aren't developing the gluten like you do with wheat flour, so you won't make the muffins tough by over mixing).

4.  Gently fold in blueberries & orange pieces.

5.  Fill baking cups about 3/4 full (about one level ice cream scoop per cup). I used the nut & party cups or the Martha Steward papers with foil on the inside, because they keep their color and shape beautifully after baking!

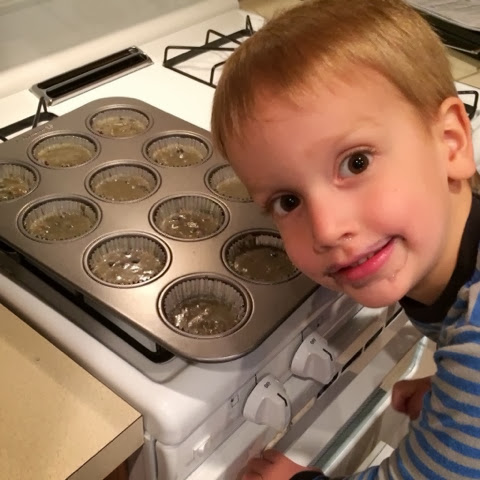
*someone* may have dipped into the batter before the muffins made it to the oven...

6.  Bake at 350° for about 20-25 minutes.

Makes 12 small muffins.

Forget everything you know about gluten-free baking, because you will be amazed by these muffins. I served them at a Stella & Dot trunk show I hosted this weekend, and everyone asked for the recipe!

Happy baking, y'all!


{Product Review} Bob's Redmill Trio

Note:  The items in this review were provided to me by Bob's Red Mill for the purpose of this review. However, the opinions expressed here were in no way influenced by Bob's Red Mill. This review represents my honest opinion about the products.


Man! I l-o-v-e trying new fun ingredients! So, you can imagine my excitement when Bob's Red Mill offered two of their new ancient grains and coconut flour for testing. My last post was a recipe with Bob's Red Mill Farro (Greek Farro Salad), and I've actually made it a couple more times. It's a great to-go lunch option! The texture is perfectly chewy and soft and wonderful! It's a new-ingredient must-try.

I played around with the other grain, sorghum, for a few weeks. There are so many uses! You can grind it up as a gluten free flour option (or buy it already ground), put it in a hot pan with some oil for the CUTEST little popcorn snack, or use it as a rice-like ingredient. I added a cup to my taco soup last night, and it was so yummy! It does take a quite a bit longer to cook than rice, so I might soak it overnight next time.


I haven't done much (read: anything) with coconut flour before, so there was a considerable amount of googling that transpired before I settled on a first-time recipe. I ended up making gluten/grain-free blueberry-orange muffins for dessert tonight. I was so surprised at the yummy texture of the muffins. They weren't mealy or gritty or squishy like other grain-free pastries I've had before. I didn't get the recipe perfect, so I'll try it again tomorrow and get it posted for y'all super soon!

And, are you ready for the best part? Bob's Red Mill is giving one awesomely lucky reader a trio of the farro, sorghum, and coconut flour - YUM! Enter to win here: 

a Rafflecopter giveaway

Greek Farro Salad

Note:  The items in this review were provided to me by Bob's Red Mill for the purpose of this review.  However, the opinions expressed here were in no way influenced by Bob's Red Mill.  This review represents my honest opinion about the products.

Bob's Red Mill graciously sent me a three pack of fun (and new!) products to try out. I'll get the recipe posts together this week and end the week with a giveaway!

First up is Bob's Red Mill Organic Farro.

When I opened up the pack of goodies from BRM, I was super excited to get to try new ingredients that I wouldn't normally have bought. Farro. Hmm. It looks like wheat berries (and Husband even said something to that effect once it was cooked), and is apparently the original ancestor to modern wheat. Since it's an heirloom variety, it's (sort of) wheat the way God intended it to be eaten. 

There is a Farroto (a play on risotto) recipe on the bag that looks amazing, but it involves soaking and quite a bit of attention. I had neither the time nor the patience for something that involved (I was hungry!), so I decided on a warm greek salad.


Ingredients

2 cups farro
¼ to ½ cup chopped olives
¼ to ½ cup chopped sun-dried tomatoes
6 to 8 ounces feta cheese
a few handfuls of greens (spinach or baby kale are yummy!)
2 teaspoons granulated garlic
¼ cup balsamic vinegar
¼ cup unrefined olive oil
salt to taste

Directions

1.  Rinse the farro and add it to a pot with about 6 cups of water. Bring to a boil.

2.  Reduce heat to medium-low and simmer for 30 minutes.

3.  Drain the farro and return it to the warm pan.

4.  Add remaining ingredients and stir over low heat until the greens are wilted.

Serve warm or chill and serve cold. 

The Farro is soft and chewy and absolutely delicious! Husband said he could eat the dish once a week and Little Bear finished all of his at dinner and ate it cold for lunch the next day. 

Sick Tea (antiviral tea)!


Hello to everyone visiting from Pinterest!  I'm so happy that you've found my little corner of the Internet :) There's quite a bit here to explore, so please have a look around! Also, I'd love it if you would join us over on Facebook:


Little Bear was sick-sick for the first time last week, and it was viral... Momma has never felt so helpless (flashback to the midnight earache incident)! All I could do is round up every antiviral in the house and treat internally (tea) and topically (balm). I can't find where I wrote the instructions for the balm, but as soon as I do, I'll get it posted, too.

The interwebs and other more-seasoned parents warned that this particular virus was a doozy and that it would entail 7-14 days of pure heck. I'm not sure if LB got off with a pansy strand of the virus, if his immune system was killer strong already, or if the tea and balm actually helped, but we only ended up with 3 days of really sick and a few days of recovery - YAY!

For what it's worth, here's our magical antiviral tea recipe:


Boil a quart (4 cups) of purified water. Pour over 1 echinacea tea bag, 1 red rooibos tea bag, and a sprig of rosemary. After the tea has cooled a bit, add a few drops of oil of oregano, 1 teaspoon of elderberry concentrate, and 2 teaspoons of raw honey. Drink 3 quarts each day until you're all better. If you can't handle 3 quarts (or can't get your little one to drink that much), make sure you're getting 3 teaspoons of elderberry and a few tablespoons of raw honey throughout the day.

Good luck!


Related Posts Plugin for WordPress, Blogger...