Showing posts with label recipe. Show all posts

{Product Review} Bob's Redmill Trio

Note:  The items in this review were provided to me by Bob's Red Mill for the purpose of this review. However, the opinions expressed here were in no way influenced by Bob's Red Mill. This review represents my honest opinion about the products.


Man! I l-o-v-e trying new fun ingredients! So, you can imagine my excitement when Bob's Red Mill offered two of their new ancient grains and coconut flour for testing. My last post was a recipe with Bob's Red Mill Farro (Greek Farro Salad), and I've actually made it a couple more times. It's a great to-go lunch option! The texture is perfectly chewy and soft and wonderful! It's a new-ingredient must-try.

I played around with the other grain, sorghum, for a few weeks. There are so many uses! You can grind it up as a gluten free flour option (or buy it already ground), put it in a hot pan with some oil for the CUTEST little popcorn snack, or use it as a rice-like ingredient. I added a cup to my taco soup last night, and it was so yummy! It does take a quite a bit longer to cook than rice, so I might soak it overnight next time.


I haven't done much (read: anything) with coconut flour before, so there was a considerable amount of googling that transpired before I settled on a first-time recipe. I ended up making gluten/grain-free blueberry-orange muffins for dessert tonight. I was so surprised at the yummy texture of the muffins. They weren't mealy or gritty or squishy like other grain-free pastries I've had before. I didn't get the recipe perfect, so I'll try it again tomorrow and get it posted for y'all super soon!

And, are you ready for the best part? Bob's Red Mill is giving one awesomely lucky reader a trio of the farro, sorghum, and coconut flour - YUM! Enter to win here: 

a Rafflecopter giveaway

Greek Farro Salad

Note:  The items in this review were provided to me by Bob's Red Mill for the purpose of this review.  However, the opinions expressed here were in no way influenced by Bob's Red Mill.  This review represents my honest opinion about the products.

Bob's Red Mill graciously sent me a three pack of fun (and new!) products to try out. I'll get the recipe posts together this week and end the week with a giveaway!

First up is Bob's Red Mill Organic Farro.

When I opened up the pack of goodies from BRM, I was super excited to get to try new ingredients that I wouldn't normally have bought. Farro. Hmm. It looks like wheat berries (and Husband even said something to that effect once it was cooked), and is apparently the original ancestor to modern wheat. Since it's an heirloom variety, it's (sort of) wheat the way God intended it to be eaten. 

There is a Farroto (a play on risotto) recipe on the bag that looks amazing, but it involves soaking and quite a bit of attention. I had neither the time nor the patience for something that involved (I was hungry!), so I decided on a warm greek salad.


Ingredients

2 cups farro
¼ to ½ cup chopped olives
¼ to ½ cup chopped sun-dried tomatoes
6 to 8 ounces feta cheese
a few handfuls of greens (spinach or baby kale are yummy!)
2 teaspoons granulated garlic
¼ cup balsamic vinegar
¼ cup unrefined olive oil
salt to taste

Directions

1.  Rinse the farro and add it to a pot with about 6 cups of water. Bring to a boil.

2.  Reduce heat to medium-low and simmer for 30 minutes.

3.  Drain the farro and return it to the warm pan.

4.  Add remaining ingredients and stir over low heat until the greens are wilted.

Serve warm or chill and serve cold. 

The Farro is soft and chewy and absolutely delicious! Husband said he could eat the dish once a week and Little Bear finished all of his at dinner and ate it cold for lunch the next day. 

Sick Tea (antiviral tea)!


Hello to everyone visiting from Pinterest!  I'm so happy that you've found my little corner of the Internet :) There's quite a bit here to explore, so please have a look around! Also, I'd love it if you would join us over on Facebook:


Little Bear was sick-sick for the first time last week, and it was viral... Momma has never felt so helpless (flashback to the midnight earache incident)! All I could do is round up every antiviral in the house and treat internally (tea) and topically (balm). I can't find where I wrote the instructions for the balm, but as soon as I do, I'll get it posted, too.

The interwebs and other more-seasoned parents warned that this particular virus was a doozy and that it would entail 7-14 days of pure heck. I'm not sure if LB got off with a pansy strand of the virus, if his immune system was killer strong already, or if the tea and balm actually helped, but we only ended up with 3 days of really sick and a few days of recovery - YAY!

For what it's worth, here's our magical antiviral tea recipe:


Boil a quart (4 cups) of purified water. Pour over 1 echinacea tea bag, 1 red rooibos tea bag, and a sprig of rosemary. After the tea has cooled a bit, add a few drops of oil of oregano, 1 teaspoon of elderberry concentrate, and 2 teaspoons of raw honey. Drink 3 quarts each day until you're all better. If you can't handle 3 quarts (or can't get your little one to drink that much), make sure you're getting 3 teaspoons of elderberry and a few tablespoons of raw honey throughout the day.

Good luck!


Mayo-free Tuna Salad (with avocado)


Hello to everyone visiting from Pinterest!  I'm so happy that you've found my little corner of the Internet :) There's quite a bit here to explore, so please have a look around! Also, I'd love it if you would join us over on Facebook:


Everyone in my house loves tuna. Tuna is cheap and easy. But, mayo is gross. Actually, I love the taste of "real" mayonnaise, but there is nothing real about the (yummy) gloopy white stuff that comes in the convenient little jars at the grocery store. I think doing away with store-bought mayo may have been one of the hardest real food conversions for me. Homemade mayo is delicious, but the eggs make me worry about sending it in Little Bear's lunch. My solution has been to make tuna salad with olive oil and a bit of vinegar (plus the typical tuna salad accoutrements). It's ok. But, not great. 

How to make it great... Let's try avocado! {spoiler alert, it was amazing!}

Scoop one avocado into a bowl.


Add a few tablespoons of unrefined olive oil, a good squeeze of lemon or lime, and whatever spices and mix-ins you like in your tuna (today I just did salt, pepper, garlic powder and dill).


Smoosh it all together, making the mixture as smooth as possible.


Add tuna and mix with the avocado mixture while flaking the tuna.


Eat.

Yum!

I measured, but tuna is so dependent on the brand, draining, and type that you'll probably have to play with the proportions to make it just perfect. As a starting point, 1 avocado + 2 tablespoons oil should be good for 2-ish cans of tuna or 4 of the single-serve packets.


The Best {Whole Wheat} Waffles Ever!


Hello to everyone visiting from Pinterest!  I'm so happy that you've found my little corner of the Internet :) There's quite a bit here to explore, so please have a look around! Also, I'd love it if you would join us over on Facebook:


I've been tinkering with this recipe for months and months now, and I think I've finally got it down just darn near perfect (at least for our palates)! The greek yogurt and the eggs add a nice amount of protein (10 grams per waffle!), and the flax/chia add fiber (7 grams per waffle!) and omegas.

Our Sunday morning tradition has been to make a batch of these and then freeze the extras for toaster waffles through the week. Because we usually end up eating these in the car after hustling out the door (have I mentioned that neither Little Bear nor I are morning people??), I put the syrup in the batter and the coconut oil keeps them so moist that you don't need butter.

I finally broke down and traded my ancient waffle maker in for a fancy Waring Pro from Costco, so my recipe has been perfected on an Belgian waffler maker. You may need to adjust the consistency (more milk, probably) if your waffles are not quite right on your machine.

Ingredients
  • 4 large eggs
  • 2 cups greek yogurt
  • 1 cup coconut oil, melted
  • 1/2 cup maple syrup (the real thing, not flavored HFCS!)
  • 2 1/2 cups milk (doesn't have to be dairy, I use coconut or rice milk)
  • 4 teaspoons vanilla extract
  • 3 cups whole wheat flour (I like WW pastry flour)
  • 1 teaspoon baking soda (aluminum & GMO free!)
  • 5 teaspoons baking powder (aluminum & GMO free!)
  • 1/2 teaspoon salt
  • 2 teaspoons cinnamon
  • 1 cup chia seeds or roughly milled flax seed

Directions

1.  In a large bowl, combine eggs, yogurt, oil, syrup, milk, and vanilla. Stir until well combined.

2.  Add the remaining ingredients. Mix until just blended, but do not overmix.

3.  Scoop the mixture into a preheated, oiled waffle maker. I spray my waffle maker with unrefined olive oil with my Misto. The extra oil gives it a nice crisp outside while keeping the inside soft and moist. I put between 3/4 cup and 1 cup batter per waffle, but this will vary between waffle makers.

4.  Serve hot! Butter and dipping syrup are optional :)  I always let my extras cool and then cut them into toaster-sized pieces (quarters) and freeze. They are actually tastier out of the toaster than fresh!


For some added fun, try mixing in a handful of De Ruijter sprinkles - they melt better than the American waxed-fake-chocolate-flavored things, and they don't make the same huge mess that chocolate chips do. YUM-OLA! {If you haven't tried De Ruijter sprinkles, they are a MUST! You will never eat the fake mass-produced crap again.}


I Heart Cowboy Toast


I know what my loves will be having for breakfast on Valentine's Day! - cowboy toast (sometimes called toad-in-the-hole toast) with a heart-y twist  :)


Ingredients
  • 1 slice whole wheat bread
  • 1 medium egg
  • 1/2 tablespoon butter/oil
  • Salt & Pepper

Directions

1.  Toast the bread to a very light brown. Use a heart-shaped cookie cutter to cut out the center of the toast.


2.  Heat butter or oil in a skillet over medium heat.

3.  Put the toast in the skillet and crack an egg in the heart-shaped hole. Add salt & pepper to the top of the egg. Cover the skillet with a lid. Cook until the yolk is at the desired level of doneness (this is absolutely a matter of preference - just keep peeking until the egg is done enough for you/your Valentine).


4.  For the kids, you may want to flip the toast (with egg intact) to make sure the egg is well-done. This will ruin the heart shape slightly, but you probably don't want to risk serving them undercooked eggs!

Homemade Instant Trail Mix Oatmeal {Not your granny's recipe!}


I think I've been pretty open about my dislike of oatmeal. Sure, it lowers cholesterol... Sure, it is whole grain and is a "real food." Sure, it's high in fiber and low in calories... Sure it boosts your immune system... Sure, it's gluten-free... {someone stop me...}

But, it's OATMEAL. Blech. Just not my cup 'o tea...

However, Little Bear is (for whatever reason) a huge fan.

Since we got rid of our microwave, it's pretty time-consuming to make a bowl of traditional oatmeal. It has to be simmered and whatnot, and I'm just not a morning person. Seriously. At all. Plus, the instant oatmeal packets have tons of refined sugar and artificial flavors, and the 100% oatmeal instant oatmeal is just gross. (read: no oatmeal for LB in the mornings)

Cue the homemade instant oatmeal!

This was a weekend project for Mommy and LB (along with frozen bean burritos and breakfast burritos), and was actually really easy to throw together:

Ingredients
  • 6 cups rolled oats
  • 3 cups dried fruit
  • 1 1/2 cup shredded coconut, unsweetened
  • 1 cup nuts
  • 1 cup chia seeds
  • 1/2 cup turbinado sugar


Directions

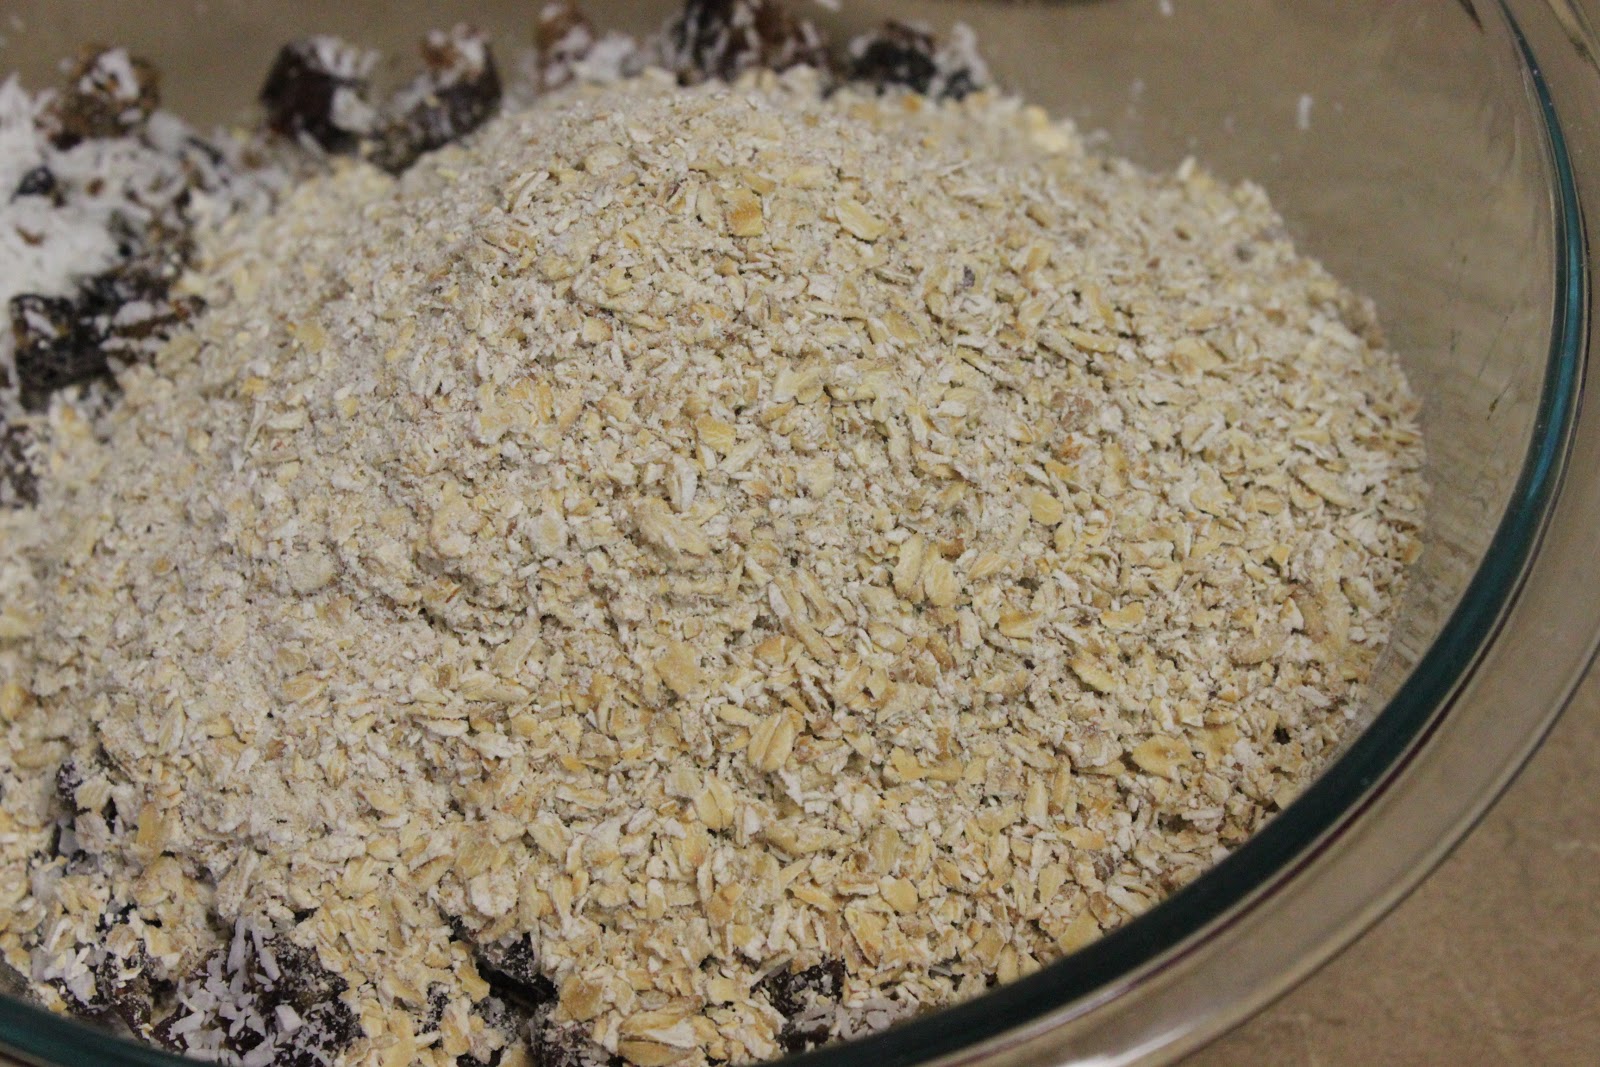
Toast the oats in the oven at 350 degrees for 20 minutes, or until lightly browned.


Lightly pulse 2 cups of the oats in a food processor (just enough to roughly chop the oats.) Pulse 2 cups of the oats slightly longer, and pulse the remaining two cups into a coarse flour.


Chop the dried fruit, either by hand or in a food processor. You can use anything, but I usually use figs, dates, and apricots. If you use a food processor, throw a handful of the oats in with the fruit to keep it from sticking together in an icky mess.


Toast the nuts until they are fragrant, but be sure not to burn them - maybe 5 minutes (the oils in nuts will make them burn pretty quickly if left unattended). I use pecans, but any nut will work.

If you want, toast the coconut, too. I love the warm toasty flavors in the morning!

Combine all of the ingredients in a large bowl. If you didn't add oats to the food processor with the fruit, you may have to break the fruit bits apart by hand, but the oats should help keep them from sticking once they're mixed together.

Unsweetned, Shredded Coconut

Store in an airtight container.


To serve, mix approximately equal parts oatmeal mix with equal parts hot water (I use my tea kettle to heat it up). Stir and let stand until thickened. Add more water, if needed. I think about 1/3 cup of the oatmeal makes a decent breakfast serving. It's much hardier and filling than the stuff sold in packets!

I have to admit that I actually really like this oatmeal! It's not gooey and is anything but bland. Plus, it's super versatile. Literally every ingredient except the oats can be subbed or eliminated without hurting the recipe!


My best estimate is that it's about $.50 per serving if you go all organic and buy from the bulk section. I wish I had a better price estimate for you, but it's harder to estimate bulk pricing when I buy ingredients for more than one purpose (ex, LB takes dried figs/dates/apricots for snack to school and I use chia in just about everything around here..)

**UPDATE:  I carefully measured out my ingredients from the organic bulk bins and and did the math. Each 1/3 cup serving came out to $.45! The price is just about the same as the Quaker junk, but this is real, wholesome food that will really give you a smart start to your day!**


What flavor combinations will you be trying??

"Hamburger Helper" Beef Stroganoff


I love taking everyday nasties (fake, processed foods), and making quick, easy substitutions. Today I ventured into the world of Hamburger Helper. I actually grew up on the stuff. We had Hamburger Helper or Tuna Helper about once or twice per week. As a kid, I hated ground beef, so I always dreaded HH nights...

Ground beef and I have made our peace, but now I have a whole list of other reasons to hate the stuff. In all reality, you might as well get fast food or a frozen meal (Stouffer's frozen lasagna is truly a better choice here). Look at the ingredients in this "American classic":


Their "wholesome family meal" advertising is total crap!

I timed my healthy version meal start-to-finish at 45 minutes, but that included measuring, tasting, remeasuring and retasting AND photographing it all.  I'm willing to bet that, in a time crunch, I could go from raw beef and whole onions to the table in under 30 minutes.


Ingredients
  • 1/2 medium onion (about 1 cup, chopped)
  • 2 tablespoons unrefined olive oil
  • 1 1/2 tablespoons fresh garlic, minced (2 cubes)
  • 1 1/2 teaspoon sea salt
  • 1 pound ground beef
  • 1/4 cup (4 tablespoons) flour
  • 2 cup beef stock
  • 1 1/2 cup whole milk
  • 10 ounces frozen mixed vegetables
  • 1 1/2 teaspoons worchestershire sauce
  • 1/2 teaspoon black pepper
  • 1 tablespoon dried parsley (optional)
  • 1 1/2 cups sour cream
  • 12 ounces whole wheat egg noodles
Directions

Finely dice the onion. This is where I am so grateful for not-so-fancy kitchen gadgets!


Heat the oil over medium heat until it is ripple-y when you swirl the pan.

Add the onions, garlic, and salt. Saute until the mix is slightly golden. {this is by far the biggest time suck of the whole recipe!}


While the onions are sauteeing, bring a big pot of salted water to boil and cook the noodles according to the package directions. When they are done, drain them and return them to your cooking pot.

My Kroger just started carrying these whole wheat
egg noodles, and they are REALLY yummy!

When the onions are ready, add the beef and cook until all the pink is gone.

Kroger also has grass-fed beef now! Woo hoo!


Add the flour and mix well. The beef will get sticky and clumpy.


While whisking, add the broth and then the milk.

Stir in the vegetables (fresh greens would wilt in nicely, too!). Add the worchestershire sauce and parsley.

Cook until the sauce thickens. If it thickens too much, add some more broth or milk to thin it out. If it it way too watery, add some cornstarch or arrowroot powder (mix with a bit of cold water first!) to thicken it up.


Add the sauce mixture and the sour cream to the noodle pot and stir well.

Done!

Little Bear and I love mushrooms, so I sauteed some with butter, salt, and a bit of red wine to top our dishes with. Husband despises mushrooms, or I would have just mixed the sauteed shrooms in with the whole pot...


Single-Serve Garlic Cubes


I'm a huge garlic fan. It goes in just about everything I cook, but I hate peeling/chopping/grating it. Plus, I'm always game for a new time-saver!

Here's how I keep my garlic fresh (in the freezer) and on-hand for instant garlicification:

I buy the big tubs of pre-peeled garlic from Costco. I've seen the same type of garlic sold in most grocery stores, too.  {note:  stay away from anything with more ingredients than just 'garlic,' because they probably have unnatural preservatives and a strange taste}


Fill your food processor, mini chopper, or blender with garlic cloves, and cover the cloves with unrefined olive oil. Add a little bit of salt. Turn your pulverizer of choice on and run until the mixture is smooth-ish and evenly blended.


Spoon the mix into a clean ice tray. If you can't easily spoon it, add a little more oil and blend again. {I didn't measure the oil-to-garlic ratio, so just keep adding oil until you get a texture that you're happy with}  Tap the trays on the counter to settle the mixture and remove any big bubbles.


Put the filled trays in the freezer for several hours, or until the garlic is totally frozen.

Put about an inch of hot water in a pyrex-type pan (tap water hot, not boiling hot). Set your ice tray in the hot water for about 30 seconds. Turn the tray over and twist *gently.* The cubes should fall out. If they don't, put the tray back in the water for another 15/30 seconds and try again. {I twisted the tray straight out of the freezer and it completely shattered all over the kitchen, so don't do that}


Because I didn't want the cubes refreezing in a big stuck-together ball, I laid them out on a plate and put them back in the freezer to completely reharden before I stuck them in a zipper freezer bag.


When you need to add garlic to any dish, just drop a cube or two into the pan, and voila!


No-Cream-of-Crap-Soup Green Bean Casserole


One of the biggest evils of the Thanksgiving meal is inevitably some sort of cream-of-something soup (known as cream-of-crap soup around my house).  Here's a really quick and really delicious recipe to do away with the cream-of-crap in green bean casserole.  

If you have another recipe that calls for a cream-of soup, just go through the recipe until you add the green beans, and you'll have a great replacement (if it's cream of celery, use celery instead of mushrooms; if it's cream of chicken, add some bouillon instead of mushrooms; if it's cheddar cheese soup, add about a cup or two of shredded cheese at the end and omit the mushrooms; etc....)

I don't have the pictures ready to upload yet, but I want to get this posted before Thanksgiving... pictures are soon to follow, though!

Here's the casserole before we bake it - I made it ahead of time
and haven't baked it yet, so there's no final picture yet!

Ingredients
  • 2 tablespoons olive oil (unrefined)
  • 1 medium onion, diced
  • 2 tablespoons butter
  • 1 1/2 cups mushrooms, finely diced
  • 3 tablespoons flour
  • 2 cups whole milk
  • 1 cup chicken stock
  • 1 1/2 teaspoons salt
  • 1/2 teaspoon ground sage
  • 1/2 teaspoon black pepper
  • 3 cloves garlic, crushed and minced
  • 2 pounds green beans (if frozen, thawed)
Directions

Heat olive oil in a medium sauce pot over medium heat.  Add the onions and sauté until soft and golden brown.  

Add the butter.  Once the butter is melted, add the mushrooms and sauté for about 5 minutes.  

Stir the flour into the onion-mushroom mixture and stir over medium heat for about a minute.  

Whisk in the milk and stock.  

Add the salt, sage, pepper and garlic.  Whisk and cook over medium heat for about 5 minutes or until the sauce is thickened.

Mix the green beans into the sauce and pour into a baking dish (or aluminum pan to save dishes!)

Bake at 350 degrees until the sides are bubbly and the top is slightly browned.  

Homemade Peppermint Marshmallows


Hello to everyone visiting from Pinterest!  I'm so happy that you've found my little corner of the Internet :) There's quite a bit here to explore, so please have a look around! Also, I'd love it if you would join us over on Facebook:


Who doesn't love marshmallows?!  That's rhetorical.  If you don't love marshmallows, we can't be friends anymore.  Just don't tell me.

We just got a firepit for the back porch, so marshmallows were a must.  I'm too cheap to spend the big bucks on the natural options (Plush Puffs are a-mazing!), and the high fructose corn syrup options were obviously a no-go.  There are several icky ingredients in Kraft's Jet-Puffed marshmallows:  Corn Syrup, Sugar, Dextrose, Modified Corn Starch, Water, Gelatin, Tetrasodium Pyrophosphate, Artificial Flavor, Artificial Color (Blue 1). Really, Kraft.  Really?  Why in the world would marshmallows need artificial food coloring??

I'd never made marshmallows before, but I was up to the challenge.  I think if the world knew how easy homemade marshmallows were, Kraft would quite possibly go out of business.  Husband just vehemently declared that he'll never eat a bagged marshmallow again.  As we polish off our 5th (6th?) giant mallow, I know I'm going to regret the indulgence later.  But, for now, yum.  just yum.

Ingredients
  • 2 envelopes plain gelatin (like Knox)
  • 1 cup cold water
  • 2 cups turbinado sugar
  • 1 tablespoon vanilla extract
  • 1/4 teaspoon peppermint extract

Directions

Pour half of the water into a bowl.  Stir in the gelatin.  Don't worry about lumps, it'll take care of itself.  Set aside.


After several minutes - looks like applesauce!

Combine the sugar and the rest of the water in a small sauce pan.  Stir over medium heat until the sugar is melted.  Add the gelatin and stir.

Bring the sugar-gelatin water to a boil.  It'll probably take 5-10 minutes to get it to boil.  You don't have to stir constantly, but don't leave the kitchen!  


Boil the mixture for 7 minutes.  Again, don't leave the kitchen!  Boiling sugar water will get foamy and boil over really quickly.  And, trust me, it's a nasty mess to clean...  If it starts boiling over, reduce the heat or pick it up off the burner for a few seconds.


Pour the mixture into the bowl of a stand mixer and let it sit for about 20 minutes.  

Beat on high/medium-high for 15 minutes.  The mixture will go from a brown syrup to a white fluff.  Pretty!


If you're wanting squares, pour the mixture into a wax paper lined half-sized brownie pan (1.5 Qt pyrex pan) that has been dusted heavily with powdered sugar.


The hardest part of this recipe is keeping your
brood out of the fluff until it sets!

Smooth the top and let it rest in the fridge for at least 2 hours - longer is better if you can wait!


Remove the marshmallows from the pan and peel the wax paper back.  Kitchen scissors made cutting the squares really easy (but still pretty messy).  


Roll each piece in powdered sugar and knock off any excess.  


Extra tip:  Rig an old spice bottle with cheesecloth
to make an easy powdered sugar shaker!

You can store the marshmallows in an airtight container for up to a week (but they absolutely, positively will not remain uneaten that long!).


As an alternative to traditional squares, you can let the marshmallow fluff sit in the mixing bowl for 20 or so minutes after you're done beating it and then dollop it onto a lined, sugar-dusted cookie sheet.  Top with sprinkles or extra turbanido sugar for added glitz and texture!


I put a couple of big marshmallows on a plate under the broiler for a few minutes and then topped it with chocolate chips.  I scooped it on arrowroot cookies (similar to graham crackers) - oh holy moly!  Best. S'mores. Ever. Ever. Ever. Ever. Ever.


Related Posts Plugin for WordPress, Blogger...